
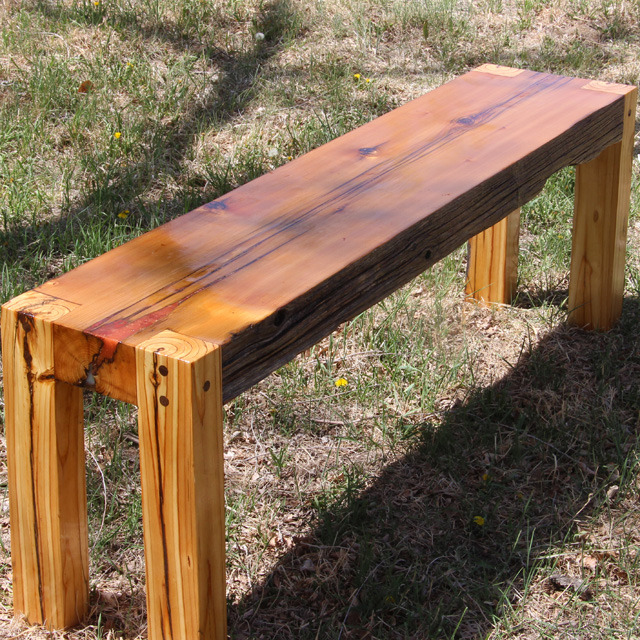
This was a fun project that took much longer than I anticipated. I decided to make an outdoor bench from some nasty reclaimed wood. This wood was really dirty and weathered.
I began by running it through the planer to clean up the pieces. The legs required a little bit of hand planing to get it square(ish), but in the end it worked out ok. I wasn’t worried about the knives on my planer because they are already nicked and in need of replacement, so I sent the dirty wood right on through. They cleaned up pretty well. I decided to leave the raw weathered look on the side of the seat.
Since these boards were so beat up there were lots of cracks to fill in. I used a lot of 2 part epoxy from System Three to fill in the cracks. I even added some stone dust to give the epoxy some color. This is where most of the time was spent on this project. I didn’t realize it was going to take 6-8 hours for the epoxy to cure. This process ended up taking me almost a week just to get the holes filled.
Once everything was filled, I sanded the epoxy down, cut some notches for the legs and epoxied them in place. Then I secured them with some walnut dowels. I didn’t want to rely on just the epoxy. After another round of sanding, I applied several coats of Minwax Spar Urethane to seal it up. Spar Urethane is a nice outdoor finish but it does require some annual maintenance. As long as you keep this in mind, I believe it can be a good choice for outdoor projects.
Overall, I’m happy with the way this bench came out, and I know it will be getting some use this summer.
Here are some affiliate links to some products used.
Minwax Spar Urethane – https://amzn.to/2IwqSCJ
System Three Epoxy – https://amzn.to/2Guok6h