
One of the advantages to being a woodworker is that you get to make things for others. We all love a nice handmade gift, don’t we? Todays project is just that, a pair of picture frames that I’ll be making for a gift. I have been planning on this project and its actually what inspired me to make a new picture frame sled as an earlier project.
I’m going to use some cherry to make these frames. Instead of trying to wrestle with a long board in my small shop, I make a quick drawing in Fusion 360 so I could get the rough dimensions for each piece, including the extra length required for the miters. This was a tremendous help, as now I could rough cut the long board into pieces before I ripped them down. This allowed me to work with much shorter pieces on my table saw. From there, I used a straight cutting bit on my router table and cut the rabbet for the artwork. You could do this on the table saw as well, but for me, the router is a safer alternative. Finally, I added a 45 degree chamfer to the outer edges of the stock. I like the look of a simple chamfer.
Now its time to really try out the miter sled. I started out making the first cut on the side opposite the stop block. Then I set the stop block to my required dimension and made the next cut, making sure to have the work piece butted up against the stop block. This was too easy. The stop block takes almost all the work out of accurately cutting picture frame stock. You just set it to the dimension of your artwork and the block does all the rest. This process went super quick. I just adjusted the stop block as needed for each piece. With all the pieces cut to length, I added some glue and clamped the frames up.
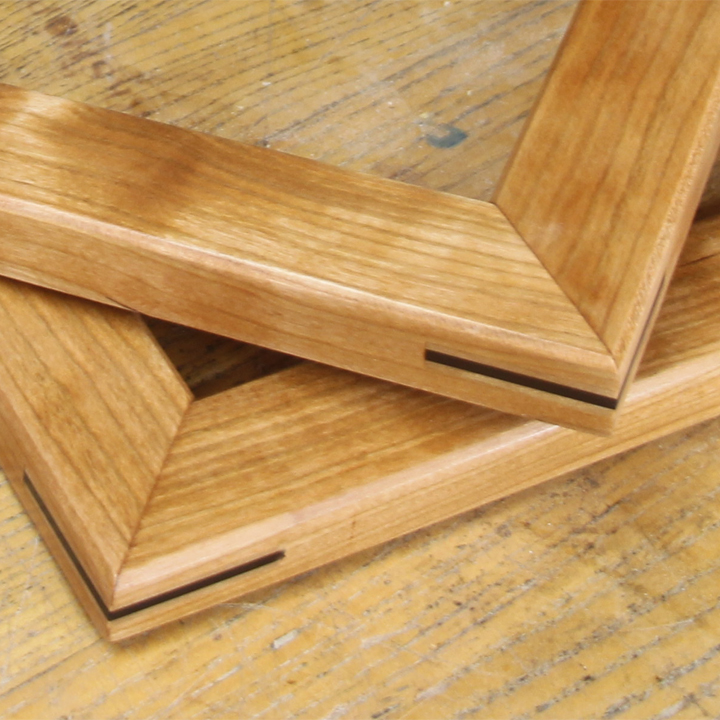
When the glue was dry I used an old jig I made years ago, to cut some splines into the corners of the frame. This jig, holds the frame at a 45 degree angle to the table of the saw and allows me to cut into the corner. I made sure to flip the piece around to keep the spline centered on the frame. After adjusting the width of the slot, I glued in some splines made from maple and walnut. This will make sure the miter joints are very strong. I then trimmed the splines flush and sanded them smooth. After giving the frames a good sanding all over, I applied some homemade finish, which is a mixture of equal parts mineral spirits, boiled linseed oil, and wipe on polyurethane. Be sure to tune in to the video to see what happened while I was waiting on the finish to dry. All I need to do now is install a hanger.
Next up, would be to install the artwork, but since these are a gift, I didn’t have the actual artwork so my part of this project is done. I’m very pleased with these frames. The picture frame sled made a huge difference in the accuracy of my miter joints. I hope the recipients will be as pleased as I am. Thanks for stopping by.
— Affiliate Links to Products Used —
Bessey Strap Clamp – https://amzn.to/3E4Azpf
Titebond Original Wood Glue – https://amzn.to/2VvSPq4
3M Sanding Block – https://amzn.to/3nk7G2s
Boiled Linseed Oil – https://amzn.to/3tAUw2i
Mineral Spirits – https://amzn.to/3E042k6
Minwax Wipe on Poly, Satin – https://amzn.to/3lc1RRT
I have a whole playlist of different picture frame videos Below.
— Here are some other videos you might enjoy —