
I’ve made several picture frames before, but I like to try different methods of making things. I decided to try making a frame using finger joints.
There are several reasons you might want to use finger joints for a frame. It is self squaring, so if you get your cuts nice and square, your frame should come out square. Another reason would be that this joint is going to be super strong. There’s a lot of surface area for glue so it makes a solid joint. You wouldn’t have to reinforce it at all if you didn’t want to. This method of joinery would be great for framing a heavy mirror or other large heavy item. For this project, I’m making a tiny little frame for Hayley Guitars.
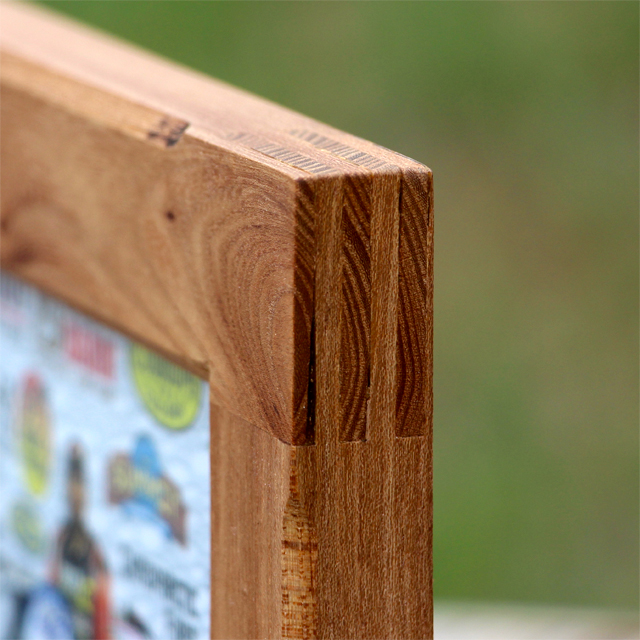
After cutting my stock down to size, I used my Finger Joint Jig to cut the fingers. I used a dedicated Rip blade that has a square profile on the teeth. This leaves the bottom of the cut nice and flat. Then I applied some glue and glued it together. After a little sanding, I used a Rabbeting bit in my router to make a rabbet for the artwork and the glass. Finally, I switched to a 45 Degree Chamfer bit to make some decorative chamfers around the edge.
I finished the frame with some spray on polyurethane, then added the artwork and glass. The frame is done and looks great.
Don’t be afraid to try out a different method of making something. Its like the saying says, there’s more than one way to skin a cat. Thanks for stopping by.
— Affiliate Links to Products Used —
Fraud Square Tooth Blade – https://amzn.to/2utUyLv
Blue Painters Tape – https://amzn.to/3fEzzeP
Freud Chamfer Router Bit – https://amzn.to/34AHiFw
Irwin 12″ Bar Clamp – https://amzn.to/2RQd6TD
Titebond 2 Glue – https://amzn.to/2utUD1L
Here are some other videos you might like.