
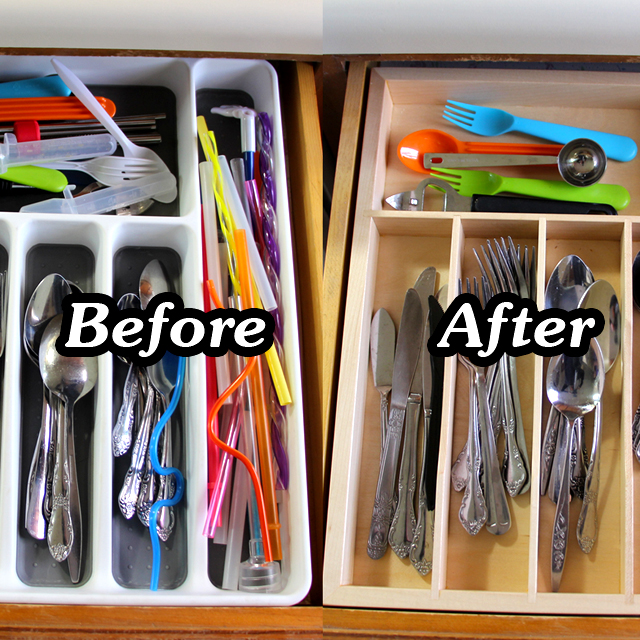
Cooler weather leads to more time spent inside. More time spent inside leads to me finding things to make for the house. This time. I’m making a new organizer tray for our silverware drawer. I got tired of the cheap plastic thing that’s in there now and decided to make one out of some nice wood.
I began by taking some measurements from the current one and making a drawing for the new one. Actual drawings aren’t something I do a lot but since this project is to have a bunch of Dadoes, I wanted to make sure I have all my measurements right. If you want to get my drawing you can download it here. You can change any of the dimensions to fit your needs or just use it as is if it works for you.
Now its on to preparing the wood. I started by planing down some maple to 1/2″ thick. This would make up the outer box. After ripping it to width, I cut it to length. Then I routed a Rabbet that would accept the bottom panel which I cut from some 1/4″ Baltic Birch plywood. Next, I grabbed my miter sled and cut 45 Degree miters on the ends of the frame pieces. Now, referencing the measurements in my drawing, I swapped out my saw blade and began cutting the small dadoes for all the dividers. This took some careful measuring, and some trial and error to get the right fit. Once I had all the dadoes cut in the outer pieces I glued up the outer box and started machining the inner dividers while that glue dried.
The inner dividers were also made from maple. I resawed some down and ran it through my drum sander to get it to 1/4″, and cut them to length. Then I used the same process to cut the dadoes in these as I did for the first pieces. The only difference was the depth of cut. This took some time to do, but worked out awesome. After a quick dry fit, I used a steel ruler to scribe out a relief cut in all the dividers. This would add some clearance for your hand as you’re reaching into the compartments. I taped the dividers together and cut them all at once. After a little sanding, I added some glue and glued the dividers in. When that glue was dry, it was time for alittle more sanding and finally a few coats of spray laquer. Bam! Done!
This silverware tray turned out awesome. I really like how it looks compared to the flimsy plastic one. If you’d like to use the drawing I made, you can get it here. Use it as a reference for your own design, or use it just like it is. Either way, its yours to use. Thanks for stopping by.
Check out the build video below.
— Afilliate Links to Products Used —
Freud Square Tooth Saw Blade – https://amzn.to/2utUyLv
Titebond 2 Glue – https://amzn.to/2utUD1L
Deft, Satin Spray Laquer – https://amzn.to/2NYyvpD