
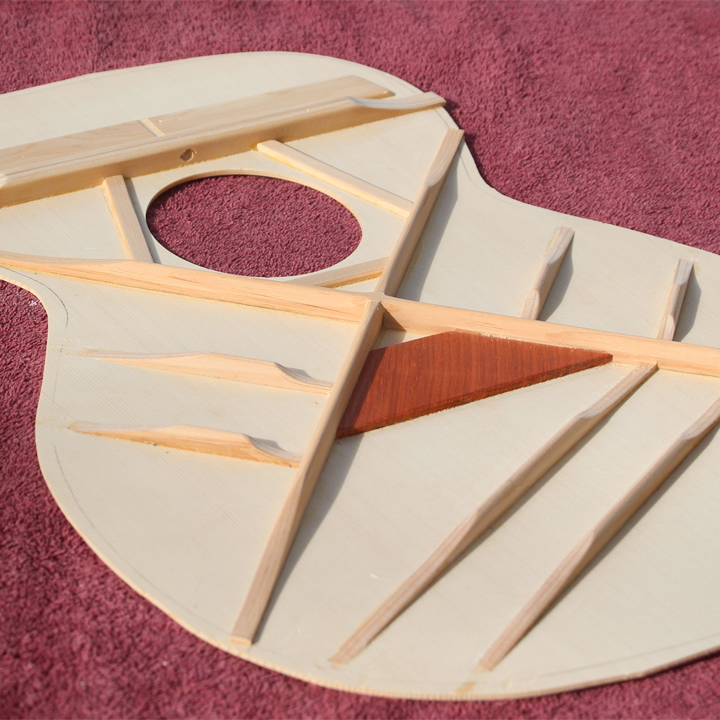
Here’s the next step of my acoustic guitar build. At this point, I have all of the braces glued in place and I’m now ready to get them shaped. This step is where things have the potential to go wrong. One slip of a sharp chisel can gouge the plates, or if you try to carve away too much at once you can even break a brace. I don’t want either of these to happen.
Before I begin carving, I need to make sure my chisel is very sharp. I’ve been using my cast iron table as a sharpening surface. It’s been working great. I just use some strong magnets to stick the sandpaper in place and sharpen away. Its very quick to set up and I’m getting a nice sharp tool as well. This is important because I want all of the cuts to be as clean as possible.
Since this is my first acoustic build, I’m sticking very closely to the plans for my dimensions. At this time, I just don’t have the experience to try to reinvent the wheel and try something new. I transferred all the measurements from the plan onto my pieces and began slowly carving away the excess material. When it came to shaping the tops of the braces, I designed a sanding block in Fusion 360, and 3D Printed it. I was able to use the plans as a drawing board and the results were great. I’m super happy with the way the braces turned out. Now its on to the next step, which will be bending the sides.
Thanks for stopping by, and stay tuned for more progress on this guitar.
— Affiliate Links to Products Used —
Chisel Honing Guide – https://amzn.to/3O7pw2p
Chisels I wish I had (lol) – https://amzn.to/3IBq27C
— Here are some other videos for you to enjoy —
