
To build this Hall Table, I decided to use a little slab of Maple, that has been hanging around the shop for a while. Its just the right size for this table.
I began by cutting a little bit of the slab off using my circular saw. It was a little bit too wide at one end, so I had to cut it at an angle to square up the top. After that, I decided to use some epoxy to stabilize a few tiny cracks in the ends. I don’t think these would ever be a problem, but I want to make sure. Once dried, I leveled the epoxy and trimmed the ends to length. Now for the cool part.
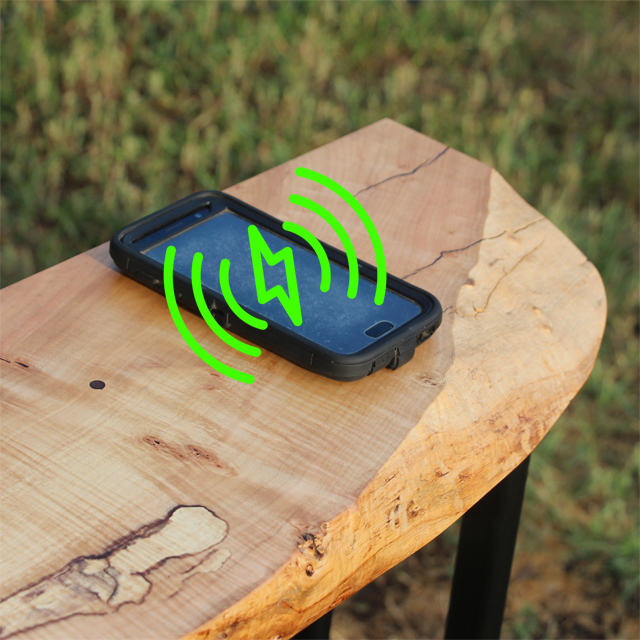
I’m going to hide an Anker, Dual Wireless Charger, in the bottom of this table. That will be awesome for charging the phone when coming in the door. I first needed to make a router template from MDF. I just traced the outline onto the MDF then cut it out with the scroll saw. I then sanded it to fit nicely. Now I can attach the template where I want it, mark out and drill some locator holes for some colored wooden plugs. These will indicate where to place the phone to charge. Now, using a forstner bit, I can remove the majority of the waste material from the charger cavity before using a template bit in my router to finalize the size. I then cut a little channel for the cord to exit the slab. After laying out and cutting some walnut scraps to make brackets that will hold in the charger, I cut a couple small notches for those brackets. On to the base.
The base is fairly simple. It consists of some 1″ square tubing welded together. I got this material from my local steel yard mostly cut to size. I had to make a few small pieces. This was a lot of work with a hacksaw but I got it done. Since this table is long and narrow, I added some brackets that I could use to attach the table to the wall if I needed to prevent tipping. I don’t feel I’ll need them, but you never know. Once welded, I cleaned up all the welds and painted the base a nice satin black. It turned out awesome.
To finish the top, I applied several coats of wipe on polyurethane to the entire slab. This really made the grain pop! After installing the charger, and attaching the top to the base, the table is done. WOW! I’m so happy with this piece. Its going to work out great in my home.
Check out the build video.
— Affiliate Links to Products Used —
Anker Dual Wireless Charger – https://amzn.to/2UPEPCY
Dewalt Circular Saw – https://amzn.to/2ZWUrFC
Total Boat Epoxy – https://amzn.to/2A1UG7F
Card Scraper Set – https://amzn.to/31kk4S0
Speed Square – https://amzn.to/2ZOf8bI
Freud 1/2″ Template Router Bit – https://amzn.to/2ZOcgeL
Minwax Satin Wipe On Poly – https://amzn.to/2ZZhi3q
Freud Chamfer Router Bit – https://amzn.to/34AHiFw
Machinist Squares – https://amzn.to/2A4VhWa
4 1/2″ Flap Disc – https://amzn.to/2ZM0j9i