
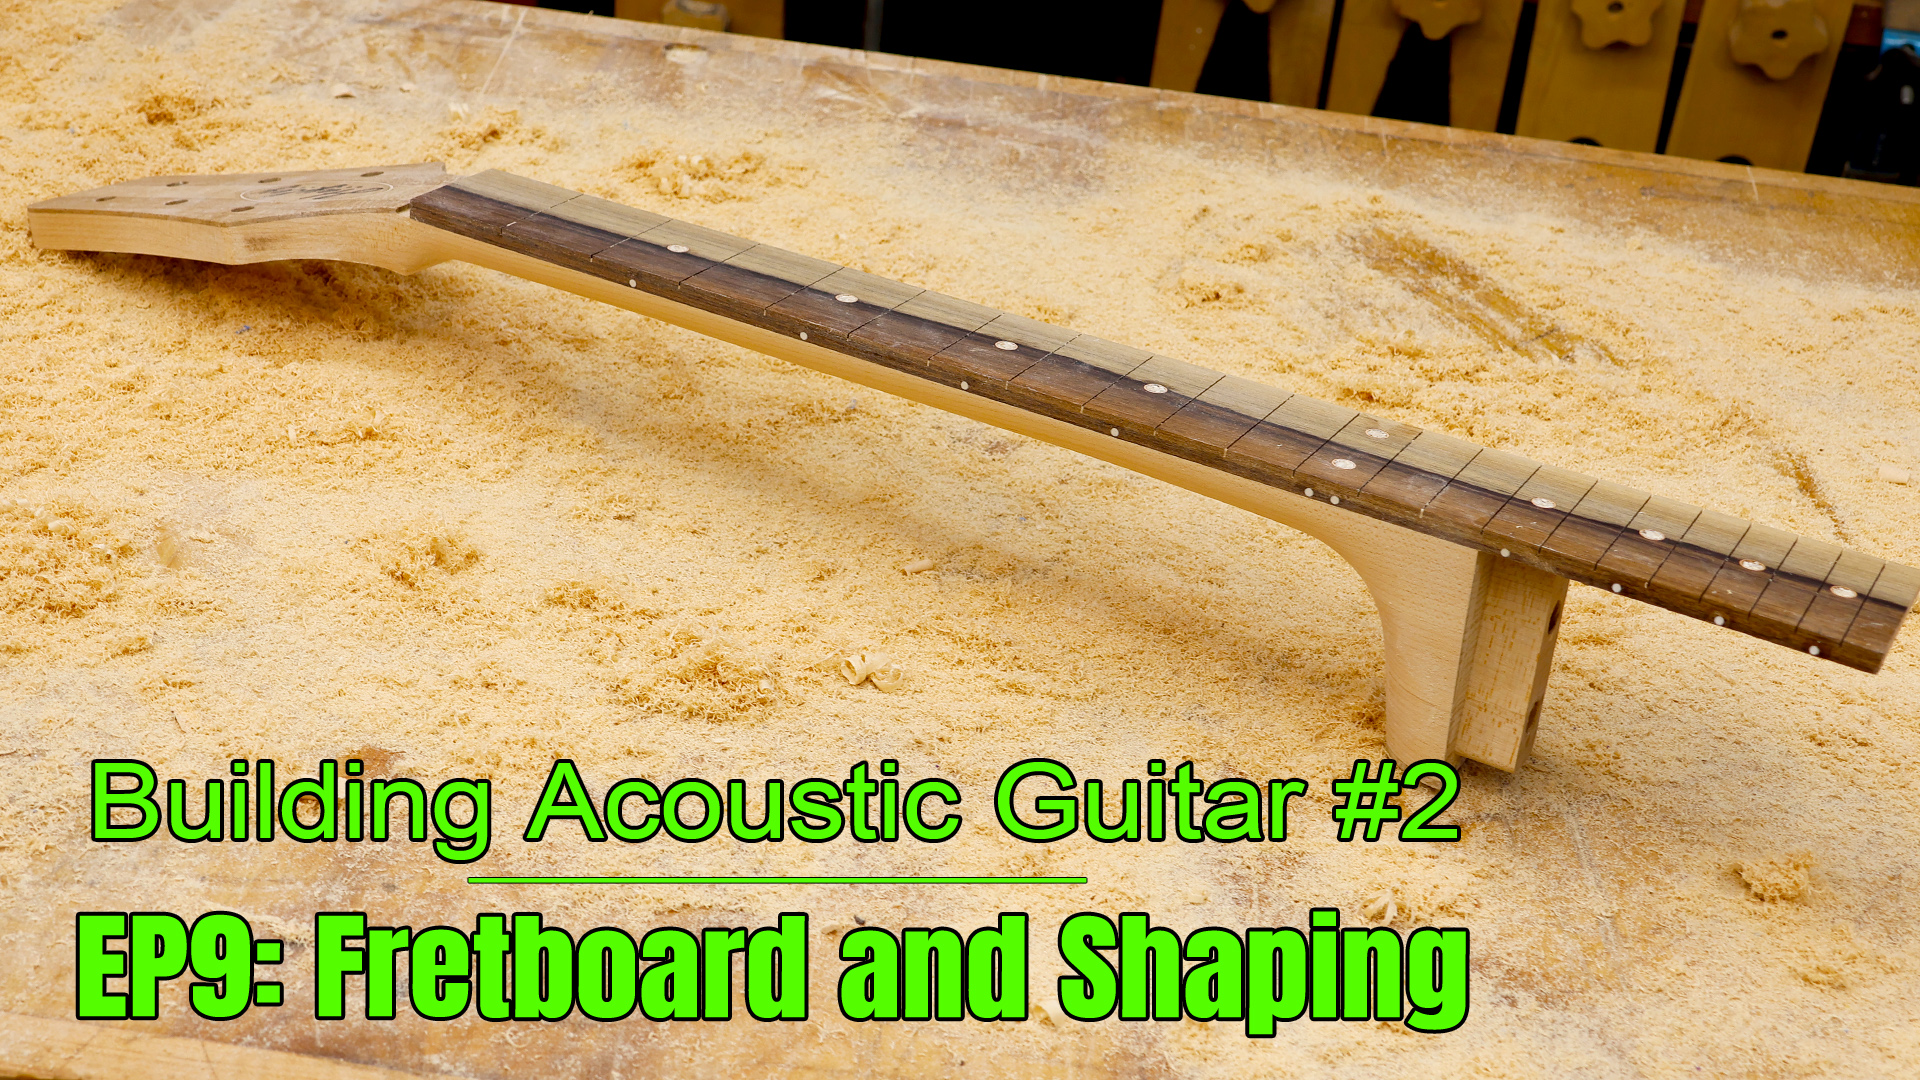
After getting the neck roughed out in the last episode, its now time to get the neck done. My first task is to cut the mortise and tenon for the neck joint. I’m using a special jig and a trim router to make these cuts. After the cots are done, I’ll install the threaded inserts into the neck tenon and drill the corresponding holes in the body. With that complete, I can start making the fretboard. I’m using a sweet piece of Bolivian Rosewood I got from Waldrop Guitars. As soon as the fretboard is glued into place, I’ll use my trusty Shinto Rasp and a ton of other carving tools to get the neck shaped. This is such a fun process to see the neck come to life. This project is getting very close to the finishing stage, and I can’t wait.
— Affiliate (Commissions Earned) Links to Products Used —
Shinto Rasp – https://amzn.to/3O0C64V
Nicholson Needle Files – https://amzn.to/3DSayu4
Mirka Sandpaper Assortment – https://amzn.to/3A9nD17
Mirka 80 Grit PSA Sandpaper – https://amzn.to/3E3Wy0x
Stew Mac Fret Slotting Saw – https://amzn.to/3fW62mf
Fret Slotting Miter Box – https://amzn.to/3E3BN4S
Machinist Square Set – https://amzn.to/3tlxgpp
Quick Grip Clamps – https://amzn.to/3TsOSuq
Creality Ender 3 v2 3D Printer – https://amzn.to/3O0Q8DC
Waldrop Guitars – https://waldropguitars.com/
Zimbelman Guitars – https://zimbelmanguitars.com/
Eric Schaefer Guitars – https://www.ericschaeferguitars.com/
Check out these other videos!
